

Amazon Elastic Compute Cloud (EC2) is a web service provided by Amazon Web Services (AWS) that allows you to create and manage virtual machines (instances) in the cloud. You can use EC2 to launch as many or as few virtual servers as you need, configure security and networking, and manage storage. Here are the basic steps for creating an EC2 instance in AWS:
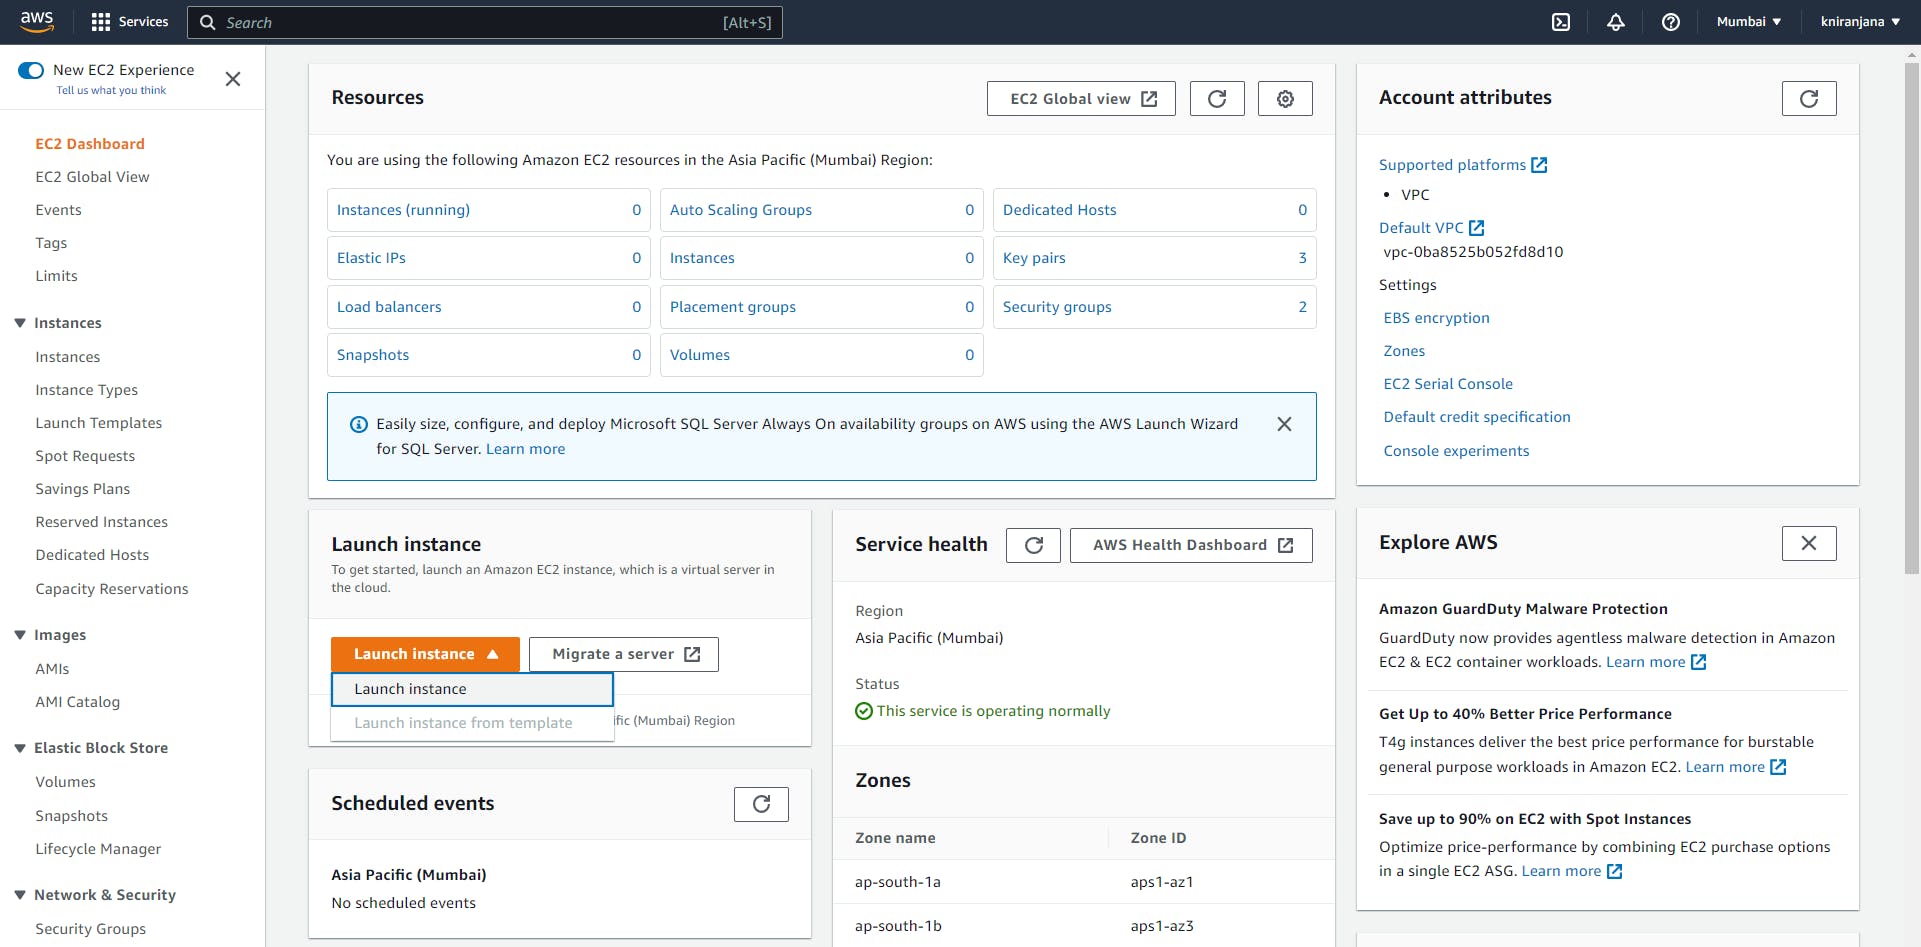
First, log in to the AWS Management Console and navigate to the EC2 dashboard.
Click on the "Launch Instance" button to begin creating a new instance.
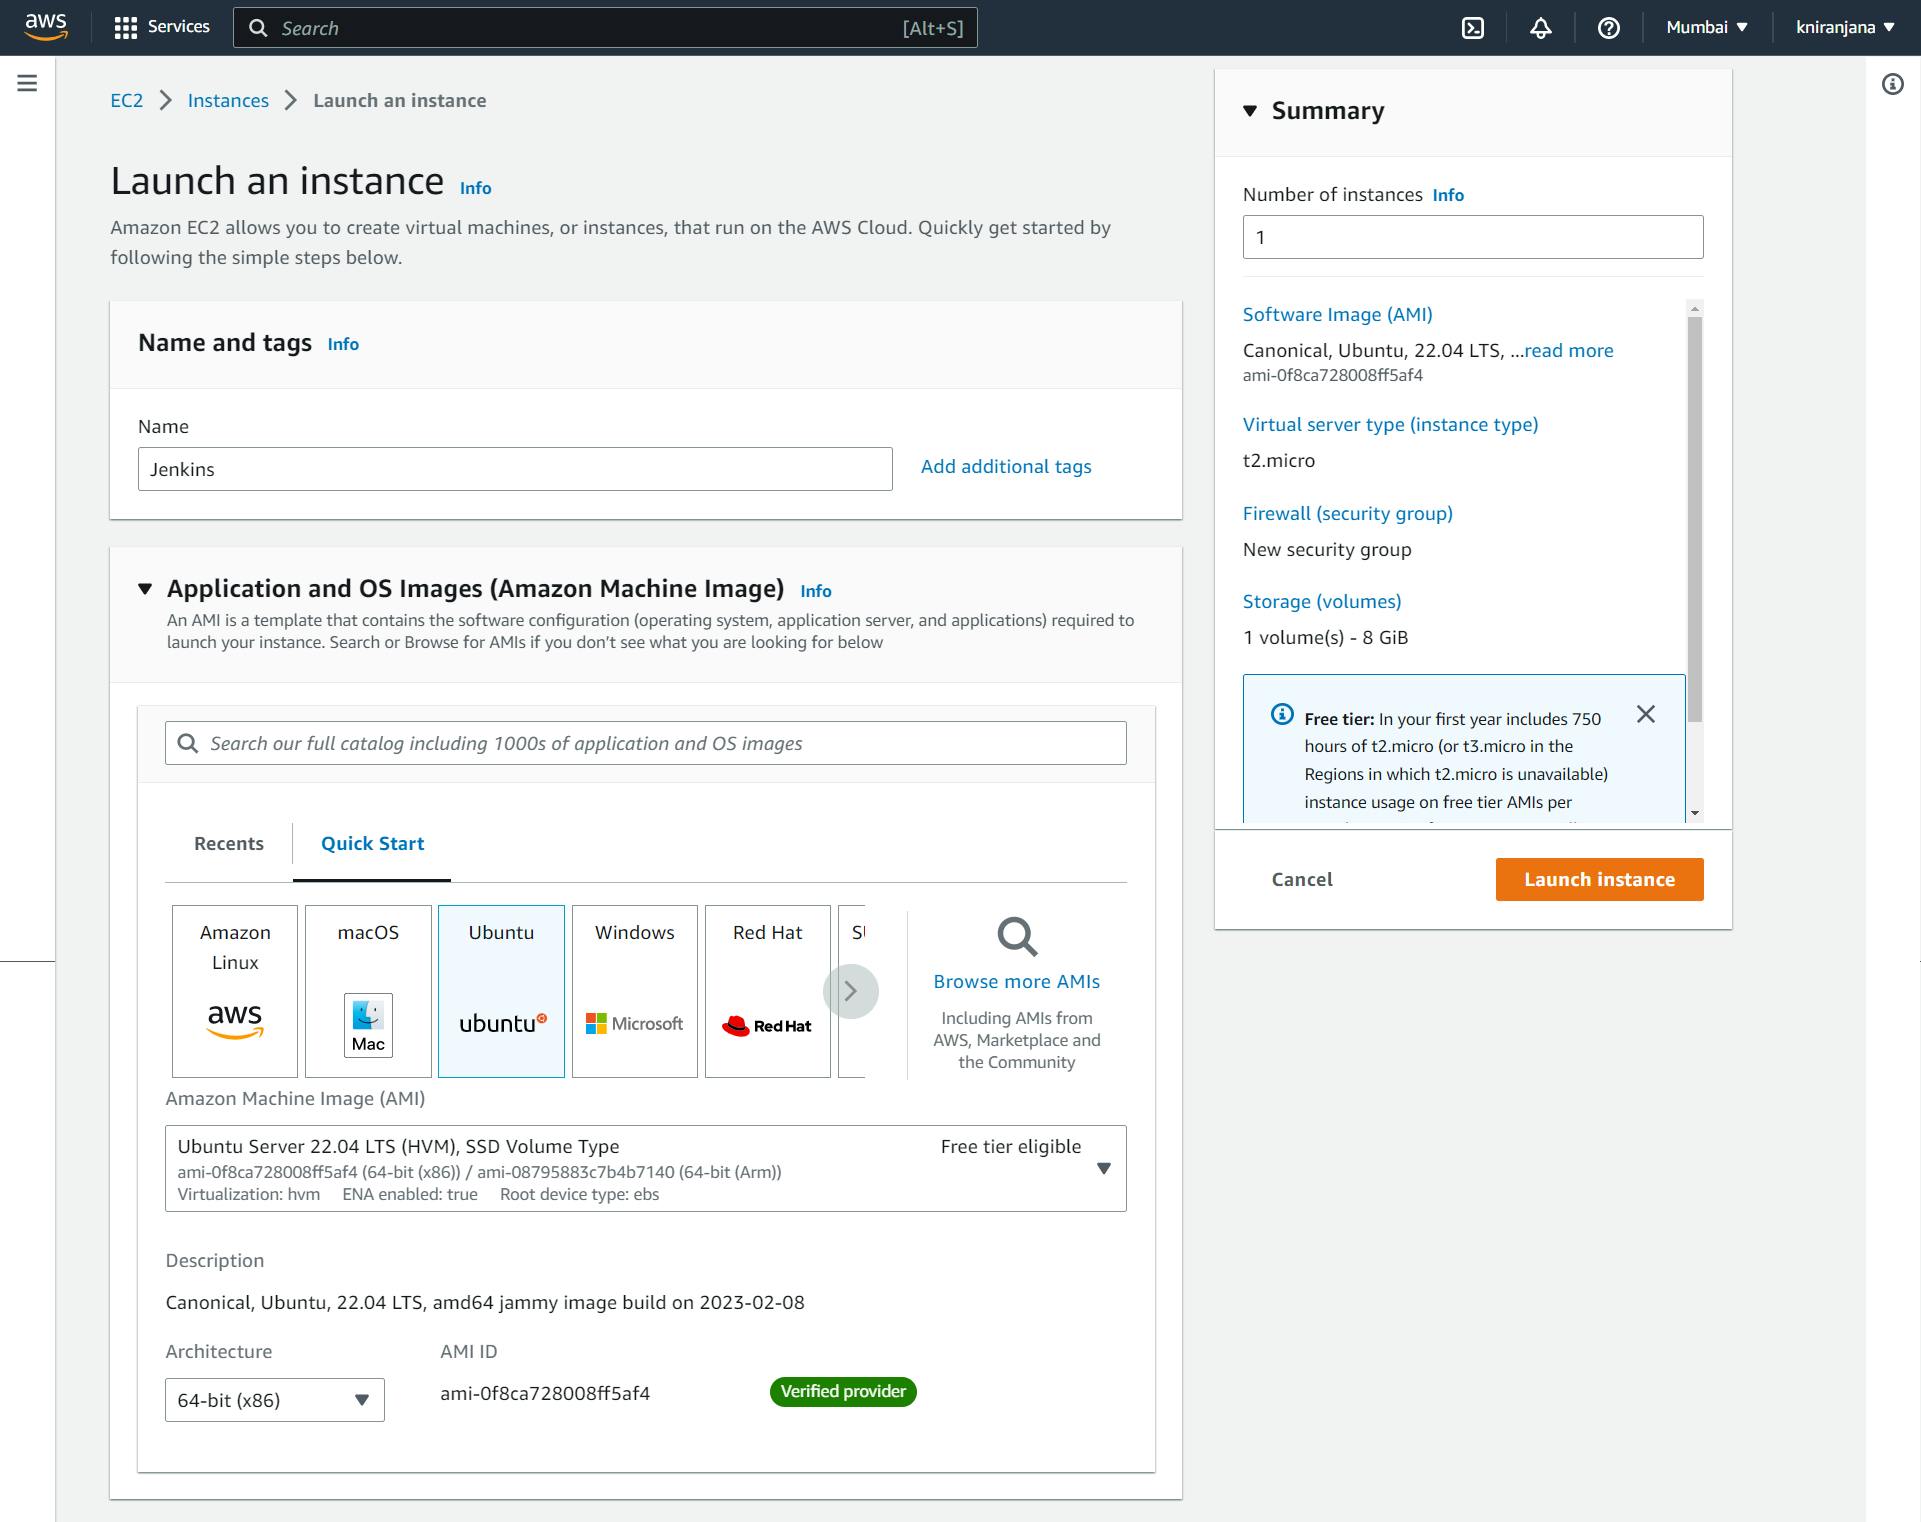
Choose an Amazon Machine Image (AMI) for the instance. An AMI is a pre-configured virtual machine image that you can use as a template for your instance.
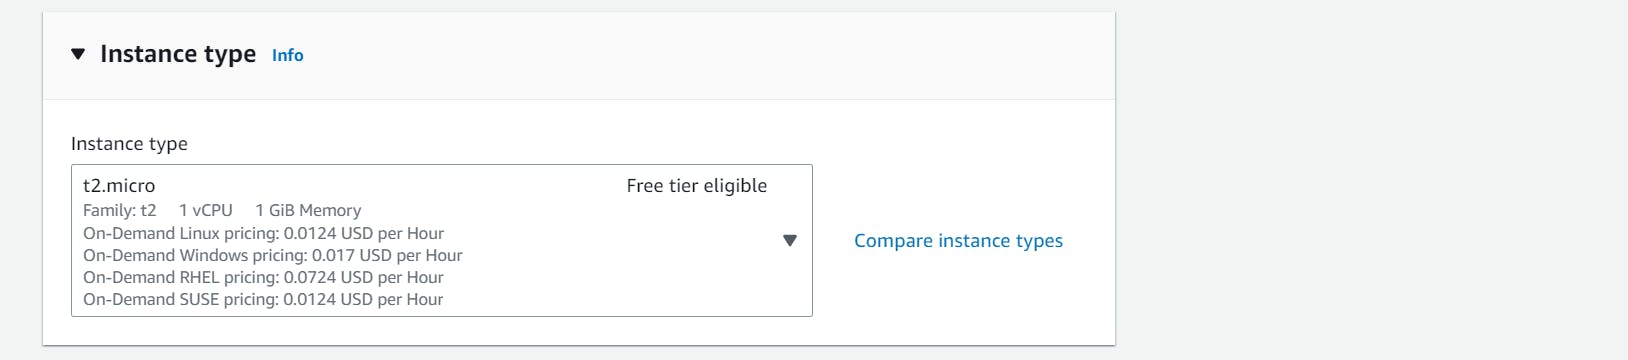
Select an instance type. This determines the hardware resources (CPU & memory.) that will be allocated to your instance.
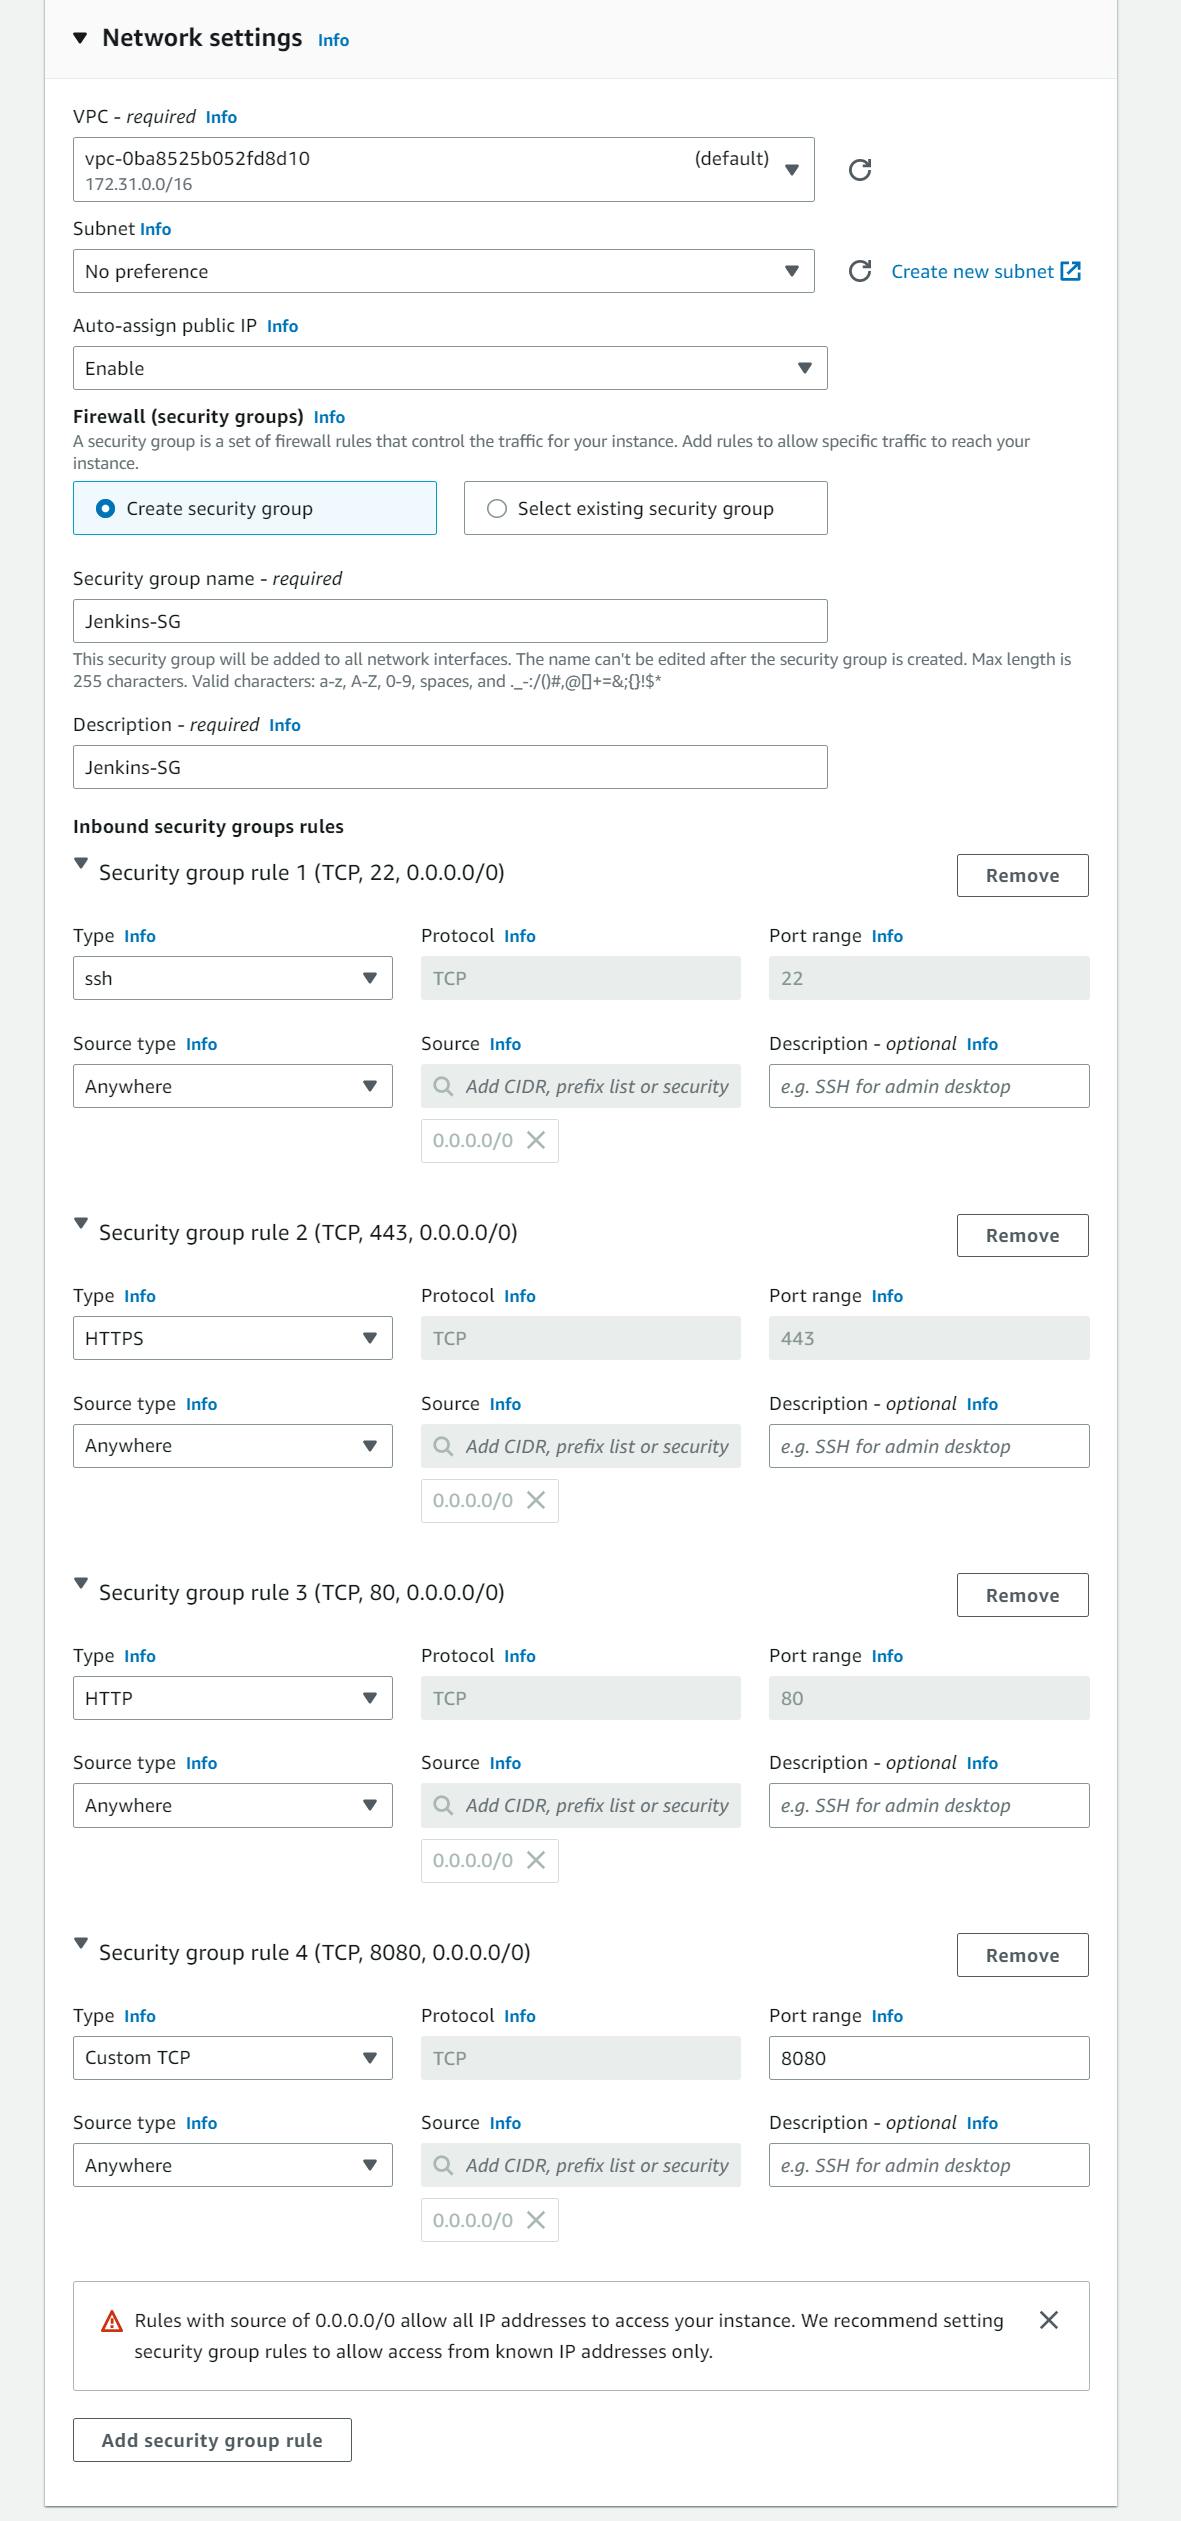
Configure your instance by specifying details such as the VPC (Virtual Private Cloud) you want to launch them in, the subnet within that VPC, and the security group for the instance. (You can choose to either create a new security group or use an existing one.)
Choose a key pair. This allows you to securely connect to your instance using SSH. You can create a new Key pair you can select an existing Key pair.

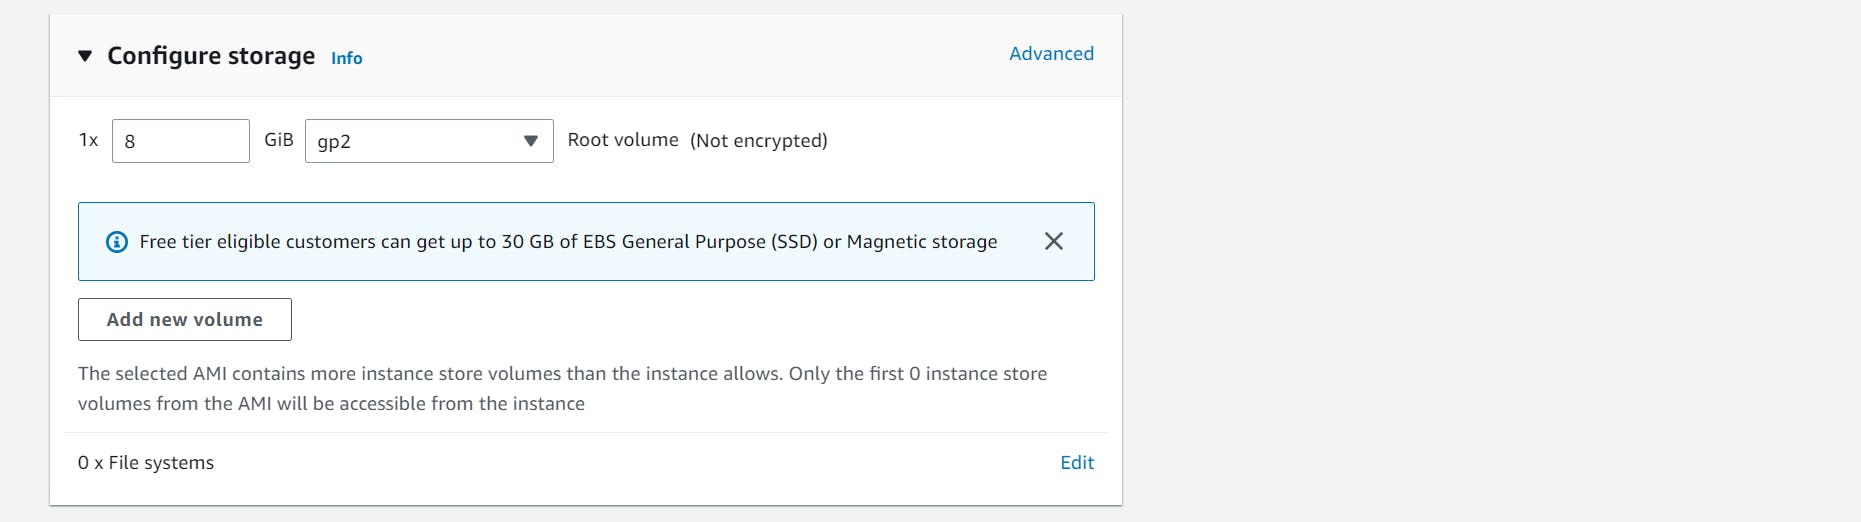
Configure your Instance Storage by defining the storage type and size for your instance.
Review your instance details and click "Launch" to start the instance.

Once your instance is launched, you can connect to it using SSH or other remote access tools and begin installing software and configuring it to your needs. You can also manage your instances from the EC2 dashboard, including starting and stopping instances, creating and deleting instances, and managing security groups and other resources.
I hope this article will help you.
-K NIRANJANA